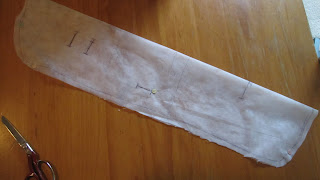
Firstly my free Tripp Trapp Cushion pattern is here for you to download and print out. It prints to 6 A4 pages, only after I painstakingly copied it onto A4 paper with my son's textas and scanned it did I realize it would be tricky to print 2 of those pages as they are full bleed. hmm bear with me and I will fix that soon, but for now it wouldn't be too hard to get around with adjusting print settings and adding selvages back in.
Now for the Instructions:
 Cut out all pieces on the fold, you will require .75 of a meter of your chosen fabric and .3 of a meter of 1cm thick foam available from Clark Rubber. Take care to add in the selvages to the seat base and back pieces as marked, these were omitted to fit it to an A4 page for printing.
Finish the non-seam edge of the 4 overlap pieces as marked. Finish the sides of the top seat back piece (the smallest one)
Attach the hook and loop tape to the seat back pieces. Use the hook & loop tape to attach the 2 seat back pieces and stay stitch them together at the top.
Stack in order the seat base foam, one fabric seat base piece (faced upwards) the two seat base overlaps, (faced downwards) and then finally the remaining seat base fabric piece.
Pin & sew closed all flat edges, leaving the curved (back) side completely open. Be sure to catch all layers in your seam, avoid Trim the corners.
Turn and press flat.
Fold the curved overlap piece over so the right sides are facing together and sew closed. The original Stokke Cushion has a serged seam here.
The turn back over so the seam is hidden and you can call it done at this point. Although the marked top stitching is optional but will assist in keeping the cushion flat.
If you intend to use the babyset put the marked buttonhole in for the strap. I have put this on the pattern, but personally I would fit it to the chair at that point to ensure it was in the right location.
For the seat back cushion lay the foam, one fabric piece facing upwards, the already finished overlap pieces facing upward and then the remaining piece facing downward.
Pin and sew around all edges except the flat bottom. The slit between the armrests and seat back are very difficult with an overlocker. For this cushion I used my sewing machines zig zag on those areas. Sew this as a open ended rectangle around 15mm wide. Trim the corners, cut the Y shapes to assist turning.
Turn and again the original Stokke cushion has an exposed serged seam along the bottom.
If you don't have an over-locker, (or like me yours breaks a $#&%* needle on the corners of the armrests moments earlier and it's now dinner time) use a tight stitch width and wide zig zag close to the edge and trim it neatly.
Then put the vertical top stitching to separate the backrest and armrests.
Sew on the hook & loop tape to the marked areas.
Take care to make sure the hook tape on the top piece reaches it over the top part of the chairs seat back to comfortably meet the middle loop peice. (The curved pocket is for the babyset backrest, you don't use this hook & loop tape when it is on)
The hook tape at the bottom is only attached on the lower long side on the Stokke cushion. This allows it to come forward to get around the lower bar of the seat back.
And TA DA your done, it's not hard at all, just fiddly and requires a bit of careful aligning of the pieces.


